



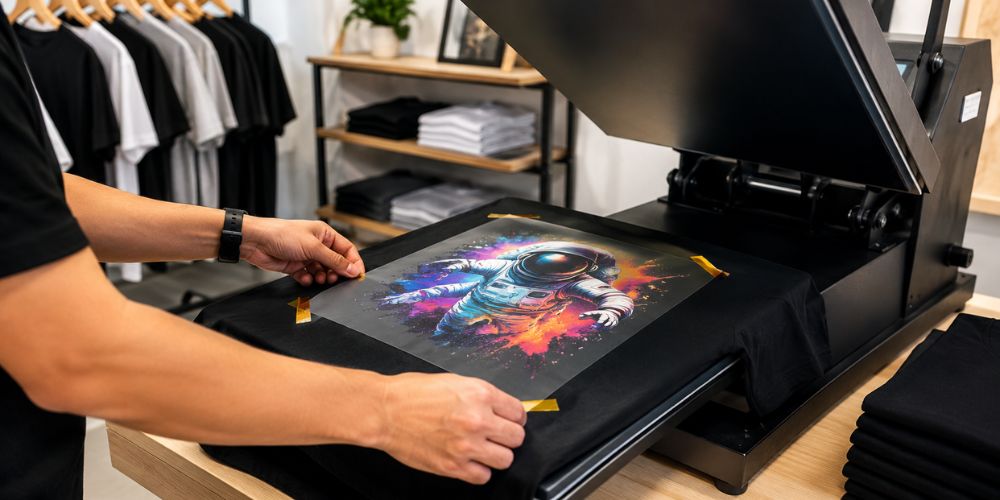
Heat tape is one of those small tools that saves a bigger job from going sideways. A transfer can be lined up perfectly by eye, then the press closes and the film shifts just enough to ruin the placement. That tiny move is enough. A logo sits crooked. A name drops lower than planned. A sleeve print looks off.
That is why heat tape matters. For anyone ordering transfers through Mad Monkey Transfers, it helps to know when tape is useful and when it is just extra work. Not every DTF press needs it. But when the design is small, detailed or placed on an awkward area, heat tape earns its place.
What Is Heat Tape Used For?
Heat tape holds the DTF film in position while heat and pressure are applied. It is made to handle high temperatures without melting onto the garment. Regular tape should never be used because it can burn, leave glue behind or damage the fabric.
This is where people often search for how to use heat tape volume because they are usually working with more than one shirt at a time. The goal is not to tape everything heavily. The goal is to stop movement without creating new problems.
A few small pieces can do the job. Too much tape can slow down production and make peeling harder.
When Should Heat Tape Be Used?
Heat tape is most useful when the transfer is likely to move. Flat chest prints on cotton shirts may stay in place without tape, especially under a good heat press. But some jobs need more control.
Use heat tape for:
- Sleeve prints
- Hat transfers
- Small chest logos
- Names and numbers
- Pocket area designs
- Transfers near seams
- Designs pressed with an iron
A large front print on a flat shirt may not need tape at all. A small logo near a collar probably does.
How Much Heat Tape Is Enough?
Less tape is usually better. One small piece on the top edge and one on the bottom edge is enough for many designs. For very small transfers, one side piece may hold it steady.
The tape should touch the clear film edge, not the printed design. If tape sits over the artwork, it can affect pressure and leave a mark. It should also stay outside the main press area when possible.
A good rule is simple. If the transfer stays flat when the garment is moved slightly, there is enough tape.
How to Apply Heat Tape Properly?
The process should feel controlled, not fussy. The garment goes on the press first. It should be smooth, flat and free from wrinkles. A quick pre-press helps remove moisture and settles the fabric.
Then the transfer is placed where it needs to sit. The decorator should step back for a second and check alignment before taping. Once tape is down, people tend to trust it too quickly.
The clean way to tape a DTF transfer is:
- Place the design flat on the shirt
- Check center and spacing
- Add small tape pieces to the film edge
- Keep tape away from printed artwork
- Press using the right settings
- Peel based on transfer instructions
This same placement habit also supports better results when following a proper heat press method.
What Mistakes Should Be Avoided?
The most common mistake is using too much tape. It feels safer, but it can create extra handling and slow down the press table. Another mistake is putting tape too close to the printed area.
Tape should not be used to fix poor placement. If the design is crooked before pressing, tape will only hold it crooked.
Watch out for:
- Regular office tape
- Tape touching the artwork
- Large strips across the film
- Taping wrinkled fabric
- Pulling tape too hard after pressing
Heat tape should support the press job. It should not become the main event.
Does Heat Tape Help With Hats?
Yes, hats are one of the best reasons to use heat tape. A hat has curves, seams and less flat space than a shirt. The transfer can slide when the press comes down.
A couple of small tape pieces can keep the design steady across the crown. The same idea applies to sleeves and bags. Anywhere the surface is smaller or less stable, tape gives the decorator more control.
For hats, this pairs well with careful placement. A recent guide on hat transfers explains why centering and pressure matter so much on curved surfaces.
Conclusion
Heat tape is not complicated, but it rewards patience. It keeps the film from shifting, protects placement and helps small designs stay where they belong. The key is to use just enough.
A clean transfer starts with good artwork, a steady press and a garment that is ready for heat. Tape simply keeps those pieces working together.
For decorators preparing shirts, hats or small-run apparel, custom DTF transfers can help turn clean placement into a finished print that looks sharp, balanced and properly pressed.