


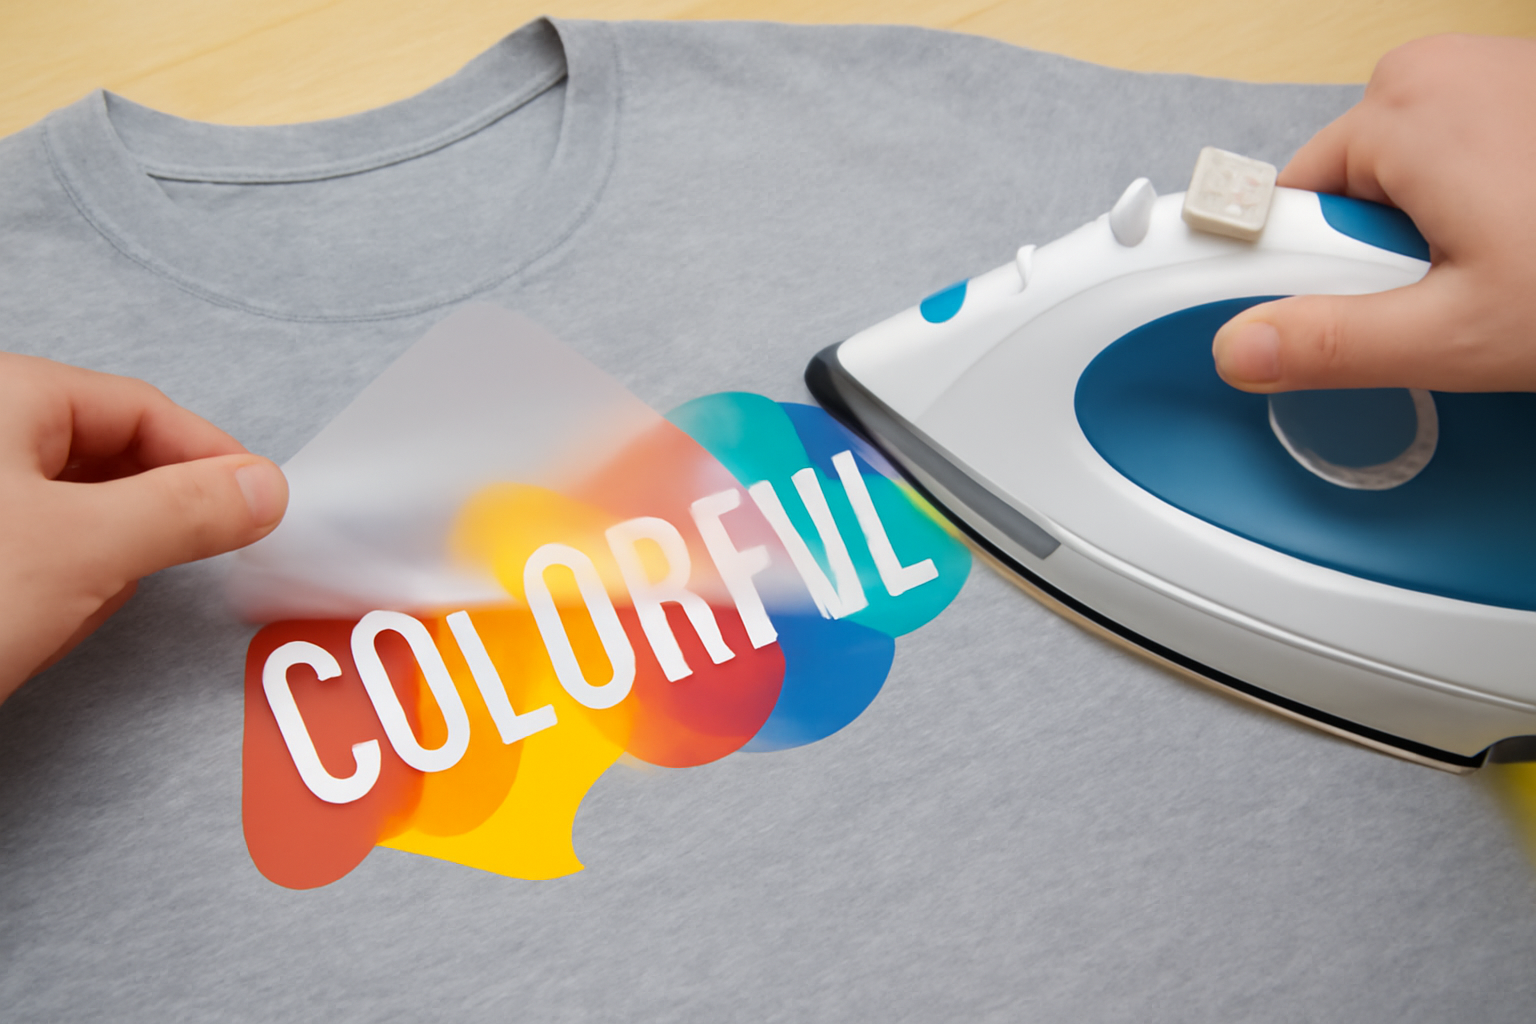
Direct-to-Film (DTF) transfers have quickly become a popular method for custom apparel decoration, allowing creators to add vibrant, high-quality designs to a variety of fabrics. While professional heat press machines can deliver exceptional results, many hobbyists and small-scale creators wonder if it’s possible to use something as simple as an iron for DTF transfer application. The answer is yes! In this blog post, we’ll show you how to achieve professional results using a household iron, breaking down the process step by step. Whether you’re a DIY enthusiast or looking to test DTF transfers without investing in expensive equipment, this guide has you covered.
Understanding DTF Transfers and Iron Application
DTF transfers are different from traditional iron-on transfers in several ways. While iron-on transfers use heat and pressure to bond designs to fabrics, DTF transfers utilize a specialized DTF film that is printed with a design and coated with a heat-activated adhesive powder. When heat is applied, the adhesive bonds to the fabric, resulting in a vibrant, durable print.
Why Heat and Pressure Matter
The key to a successful DTF transfer lies in the correct amount of heat and pressure. Heat activates the adhesive, while pressure ensures that the design adheres firmly to the fabric. Using an iron for this process requires careful attention to temperature and pressure distribution to ensure even and lasting adhesion.
Iron vs. Heat Press: What’s the Difference?
While a heat press offers even heat distribution and consistent pressure, an iron can still produce excellent results, particularly for small projects. However, it requires a bit more skill and attention. Iron application is perfect for hobbyists or occasional users who don’t have the space or budget for a heat press.
Why Consider Using an Iron for DTF Transfers?
For many hobbyists and home crafters, using an iron offers several advantages:
-
Cost-Effectiveness: Ironing is an affordable option for those not ready to invest in professional equipment.
-
Space-Saving: Irons take up far less space than heat presses, making them ideal for smaller work areas.
-
Portability: Irons are portable, allowing you to apply your custom DTF transfers on the go, whether at home or at craft events.
-
Testing and Experimentation: If you’re new to DTF transfers, using an iron allows you to test designs and processes before committing to larger, more expensive equipment.
Essential Preparation Before Iron Application
Before applying DTF transfers with iron, preparation is key to achieving the best results. Here are the essential steps:
Workspace Setup
Choose a firm, heat-resistant surface to work on. An ironing board is usually ideal, but in a pinch, you can also use a hard, flat surface like a countertop with a thick towel underneath for added protection.
Environmental Considerations
Ensure the room temperature and humidity are conducive to the transfer application. A well-ventilated area is essential, as heat can sometimes cause fumes, especially with adhesives.
Safety Preparations
Always wear heat-resistant gloves to protect your hands, and ensure your workspace is free of flammable materials. Fire safety is important when working with high temperatures.
Material Preparation
Pre-wash the fabric to remove any dust or oils that could affect the adhesive’s performance. Ensure the fabric is compatible with UV DTF transfers, as some fabrics, such as polyester or mixed fibers, can present challenges.
Equipment and Tools for Iron Application
To ensure a smooth and successful application, gather the following tools:
Iron Selection
Not all irons are created equal. You’ll need an iron with adjustable temperature settings. A steam iron is not recommended; a dry iron will give you better results. Make sure the iron plate is clean to avoid transferring unwanted residues onto your fabric.
Supporting Tools
Use parchment paper or Teflon sheets to protect both your fabric and the transfer. Firm padding materials, like a thick towel or padded mat, can also help create even pressure.
Pressure Enhancement Tools
If you don’t have a heat press, you can enhance pressure with DIY methods, such as using a rolling pin or placing a heavy object on the iron to distribute pressure evenly.
Materials Compatibility for Iron Application
Not all materials are suitable for DTF transfers. Consider the following:
Fabric Types
Cotton and cotton blends are perfect for DTF transfers, while polyester fabrics might require adjustments in temperature. Mixed fabrics with different textures may present challenges, and the thickness of the fabric can also impact the transfer quality.
DTF Transfer Types
Standard DTF transfers are suitable for most applications, but if you’re using special formulation transfers or particularly complex designs, you might need to adjust your technique.
Pre-Application Preparation Steps
Proper preparation is vital to ensuring your DTF transfer sticks correctly.
-
Fabric Preparation: Ensure the fabric is clean, wrinkle-free, and dry before starting the application process.
-
Transfer Preparation: Inspect the transfer for any defects, and trim it to the correct size. Be sure to remove the protective backing without contaminating the transfer.
-
Iron Preparation: Clean the iron plate thoroughly, set the correct temperature for your fabric type, and make sure to disable the steam function.
Step-by-Step Iron Application Guide
Now that your workspace and materials are ready, it’s time to apply the transfer. Follow these steps to achieve the best results:
Step 1: Temperature Setup
Set your iron to the recommended temperature for your fabric type. Allow it to fully heat up, and always test the temperature to ensure it’s accurate.
Step 2: Fabric Pre-Pressing
Press the fabric for a few seconds to remove any moisture or wrinkles. Pre-heating helps ensure an even surface for the transfer.
Step 3: Transfer Positioning
Place your transfer on the fabric, ensuring it is aligned and centered. You can secure it lightly with pins or tape to avoid any movement.
Step 4: Initial Press Application
Apply the iron over the transfer, using firm pressure. Start at one end and move slowly, making sure each section of the transfer gets equal coverage.
Step 5: Heat and Pressure Distribution
Ensure even heat distribution by overlapping the iron slightly over each section, sealing the edges to prevent peeling.
Step 6: Cooling and Peeling
Allow the transfer to cool slightly before peeling. Depending on the manufacturer’s instructions, you may need to peel the backing hot or cold.
Step 7: Final Pressing
To ensure maximum adhesion, use the iron for a second pressing over a protective sheet.
Conclusion
Successfully applying DTF transfers with an iron is possible with the right preparation, tools, and technique. While it may not offer the precision of a professional heat press, the iron method is an excellent option for hobbyists and small-scale users. Remember, practice makes perfect, so don’t be discouraged if your first attempts aren’t flawless. Keep refining your technique and experiment with different fabrics and designs to achieve the best results.