



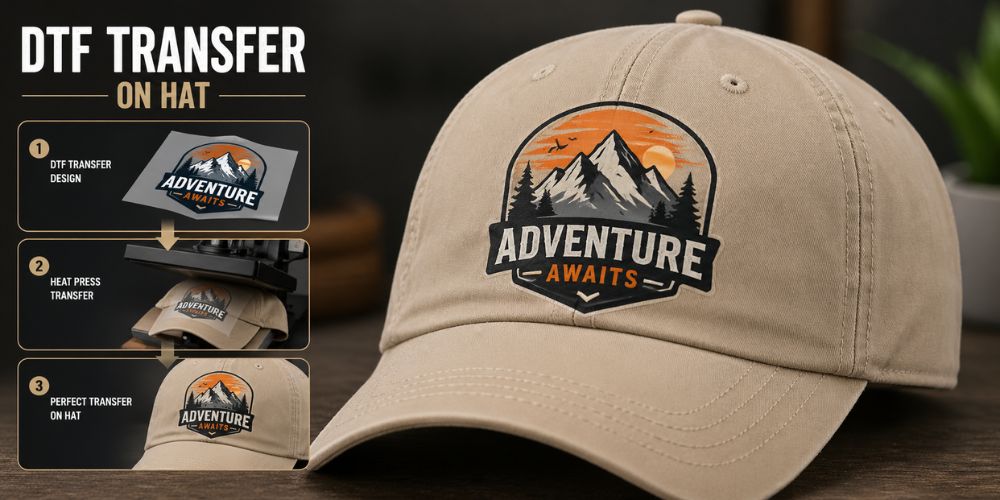
Custom hats stay popular because they are useful, wearable and easy to remember. Small brands, event teams and local shops all use them. The challenge comes during decoration. Hats are curved, structured and less forgiving than flat shirts. That is why many first attempts fail.
When the process is done right, a DTF transfer can look clean, sharp and durable. A trusted source such as Mad Monkey Transfers gives decorators a strong starting point with quality prints and dependable film.
Why Hats Need a Different Approach?
A shirt lays flat. A hat does not.
Most hats have seams, front panel structure and a rounded crown. That shape changes pressure during pressing. If heat does not hit evenly, edges may lift or the print may wrinkle.
Common Issues Include:
-
Uneven adhesion
-
Press marks
-
Crooked placement
-
Cracked prints after wear
-
Peeling around seams
That is why setup matters as much as pressing.
What Is Needed First?
Before applying a transfer, the decorator should prepare the right tools.
Basic Equipment
-
Hat heat press or curved platen press
-
DTF transfer
-
Heat resistant tape
-
Lint roller
-
Teflon sheet or parchment paper
-
Clean hat
A hat press usually gives better control than a flat press because it follows the cap shape more naturally. Many experienced shops prefer it for cleaner results.
Choose the Right Hat
Structured trucker caps, cotton twill caps and many five-panel styles work well. Very thick seams, loose knits or heavily textured surfaces can be trickier.
The decorator should inspect:
-
Front seam height
-
Fabric blend
-
Crown stiffness
-
Surface smoothness
If the front seam is bulky, the design may need to sit slightly above it.
Prep the Hat Properly
The hat should be clean and dry. Dust, lint and oils interfere with adhesion. A lint roller removes debris quickly. Next, pre-press the hat for a few seconds to remove moisture and relax the fabric.
Moisture trapped inside fibers can weaken bonding. Many pressing guides recommend a short pre-press before application.
Position the Transfer
Placement decides whether the hat looks premium or amateur.
The decorator should center the design carefully. Most front logos sit in the middle of the crown, above the bill line. Heat resistant tape helps keep the transfer from shifting when the press closes.
Quick Placement Tips
-
Check centerline visually
-
Keep spacing even from left and right panels
-
Avoid heavy overlap on seams
-
Test with one sample first
Small errors stand out on hats more than shirts.
Apply Heat and Pressure
Follow the transfer supplier’s settings first. Those instructions should always override generic numbers.
Many DTF hat applications use medium to firm pressure with controlled heat for a short press cycle. Some guides cite around 310°F for about 12 seconds, though settings vary by material and transfer type.
The decorator should:
-
Load the hat snugly on the press
-
Place the transfer
-
Secure with tape
-
Press using recommended settings
-
Open smoothly
Do not overpress. Excess heat can distort fabric or flatten the cap shape.
Peel and Finish
Some transfers are hot peel. Others are warm or cold peel. The backing should be removed exactly as directed by the supplier.
After peeling a short finishing press with a cover sheet often improves bonding and surface feel.
If edges lift, the decorator should repress briefly with proper pressure instead of forcing the peel.
For long-term durability tips, many shops review care methods such as this resource on how to wash transfer apparel correctly.
Mistakes That Hurt Results
Pressing Over Thick Seams
Seams reduce contact. Reposition if needed.
Using Too Much Heat
More heat does not always mean better adhesion.
Rushing Alignment
A crooked logo on a hat is obvious immediately.
Ignoring Test Presses
One sample can prevent wasted stock.
Why Quality Transfers Matter?
Even perfect technique cannot rescue poor film, weak adhesive or muddy print detail. Strong transfers save time, reduce rework and hold up better after repeated wear.
That is where dependable production partners matter.
Conclusion
Applying DTF transfer on a hat is simple once the decorator respects shape, pressure, and placement. Clean prep, accurate alignment, and correct press settings make the biggest difference. Cheap shortcuts usually show fast.
For decorators who want crisp color, reliable peel performance, and consistent results, professional Custom DTF Transfers from Mad Monkey Transfers provide a smart foundation for cleaner hat production.