


A clean logo, good placement, quality fabric. Now, suddenly your team looks sharp without anyone trying too hard.
That is where the method matters. DTF Transfer printing has become genuinely popular for custom polo work and it is not hype. The results hold up in ways that other methods simply do not. Mad Monkey Transfers has been doing this long enough to know the difference between a transfer that looks good on day one and one that still looks good months later.
Polo Shirts Are Tricky to Print On
Not many people realize this going in. Polo shirts as they are the classic ones, these are usually a cotton-polyester pique blend. That texture is part of what gives them the look, but it also makes the surface uneven. Seams sit close to where logos usually go. The collar area does not lay flat.
Screen printing has a rough time with all of that. DTF does not. The transfer bonds into the fabric fibers themselves rather than resting on the surface. This is why DTF prints bend without cracking and hold through repeated washing. The print is essentially part of the shirt at that point, not something stuck onto it.
Smaller orders are just as viable too. Eight shirts or eight hundred, the quality does not change.
File Setup Makes a Bigger Difference Than You Think
Get the Format Right First
Now, by working with a transparent background, PNG can be a nice asset. As well as how if you do not use transparency, the white filling around your artwork can suit well for your printer. No less, it will look quite dandy on your T-shirt. On the other hand, the artwork gets to be printed on you shirt with ease while the finish looks splendid.
Resolution should be 300 DPI or higher. Files that look crisp on a monitor often print with soft edges when the resolution is too low. If the original artwork exists as a vector file, AI or EPS, use that. Vectors do not lose quality at any size, which gives you more control over how the final print comes out.
Sort the Colors and the Size
Design software defaults to RGB. DTF printers run CMYK. Those two colour systems do not translate perfectly and when the conversion happens at the printing stage rather than yours, colours shift in ways you did not intend. Blues flatten out. Reds go warm. Switch your file to CMYK before you send it over. It takes a minute and prevents a reprint conversation.
Left-chest logos sit well between 3.5 and 4 inches wide. Full front prints can run up to 12 inches. Work out the size before the artwork is finalized, not as the last step.
Placement Is Where Most Orders Go Wrong
Standard Chest vs. Other Positions
Left chest, three to four inches below the collar, slightly left of center. That is the standard for a reason. It is where the eye goes naturally and it works across almost every polo application, corporate uniforms, hospitality, sports clubs, branded event staff.
Full front is a bolder call. Better suited to event merch or team kits where visibility is the point. Upper back near the yoke works well for roles where the back of the shirt gets seen more than the front, like floor staff or venue crew.
Clearance Around the Print Area
Stay at least one inch clear of collar edges, button plackets, any visible seam. Printing over structural parts of the shirt warps the design and weakens the adhesion around those areas. A well-made logo still looks like a mistake if it is sitting half on a seam.
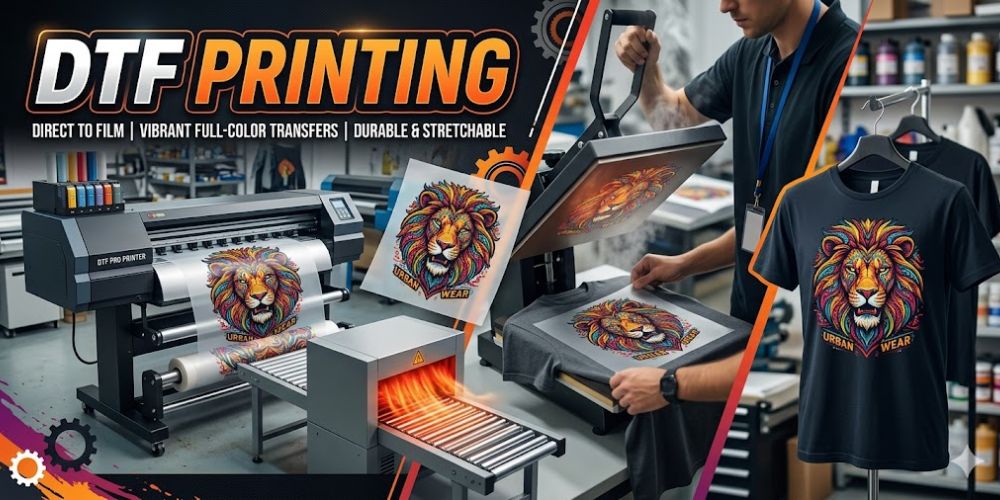
How DTF Actually Gets Made
The design prints onto PET film. A white base layer goes down first. Without it, colours on dark or mid-tone fabrics look washed out and thin. That base is what makes a print on a navy polo look as vivid as one on a white shirt.
Adhesive DTF powder is applied while the ink is still wet. Then the sheet runs through a curing oven to set. After that, it is ready to press.
The heat press is where real skill comes in. Temperature, pressure, timing. Now, each one affects the result. Too much heat scorches the fabric. Too little and the transfer starts lifting at the edges within a few washes. Getting it consistently right takes more experience than most people expect.
Washing Your Printed Polos Without Ruining Them
Wash it inside and out while using a gentle cycle. On top of that, a heated drying system softens the sticky layer. In fact, there's also the case how air tends to keep the print intact longer.
No bleach. Fabric softener slowly breaks down the bond and you will start to notice it around the fifteenth or twentieth wash. When ironing, flip the shirt inside out and keep the iron off the print area entirely.
Simple habits, but they genuinely extend the life of the print. A quality DTF transfer applied properly will hold up through fifty-plus washes when you treat it right.
Conclusion
Branded polo shirts either hold up or they do not. There is not much middle ground once the shirts are out in the world and getting washed every week.
DTF printing gives you the durability that the job actually requires. The colour stays, the edges stay clean, the flexibility stays intact. For work that holds up the way it should, Mad Monkey Transfers and its DTF printing can be of help, as the standard gets set.