Ever dreamed of adding vibrant designs to your wooden crafts or furniture? DTF (direct-to-film) transfers have become a popular way to decorate fabrics, but what about wood? We're diving in to see if this handy technique can work its magic on wooden surfaces. Join us as we explore the possibilities of DTF on wood, from the process itself to the pros and cons. Is it the perfect match for your next project? Let's find out together.
Is it Suitable to Apply DTF transfers on Wood?
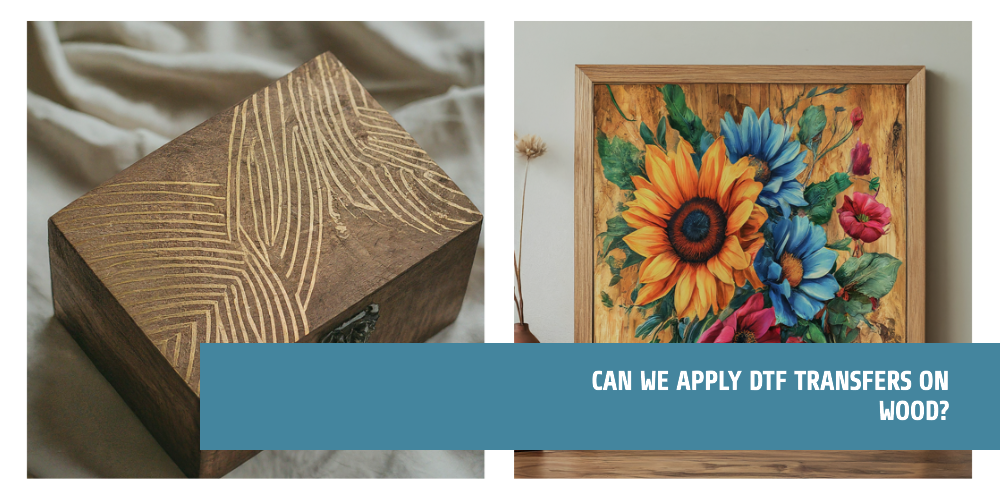
Yes, DTF transfers are a great way to decorate wood. They offer a versatile and user-friendly method for adding colorful and detailed designs to your wooden projects. Here's why DTF might be a perfect fit for you:
Works on Wood: DTF transfers are versatile and can adhere to various materials, including glass, textile metal and even wood.
Crisp Designs: The printing process allows for intricate details and vibrant colors, making your designs pop on the wood.
Natural Wood Grain: Unlike some other decorating methods, DTF transfers won't hide the natural beauty of the wood grain. You can showcase the wood's texture while adding your custom designs.
What is the Downside of Applying DTF on Woods?
Things to Consider with DTF on Wood:
Prepping the Wood: Wood is naturally uneven, so to make sure the design sticks well, you might need to spend a bit more time getting the surface ready than you would with fabric. This could involve sanding, priming, or sealing the wood, depending on the type of wood and the finish you want. We can definitely help you figure out the best prep process for your project!
Durability Over Time: Regular DTF inks made for fabrics might not be as tough on wood, especially if it's going to be outside or gets a lot of use. To make your design last, consider adding a clear coat sealant on top. There are also special DTF inks made for wood applications that resist scratches and water better. We can help you choose the right ink for your project's needs.
Extra Step: Because prepping the wood is often needed, applying DTF to wood takes one extra step compared to putting it directly on the fabric. It's a small trade-off for the unique look you can achieve on wood, though.
How to Apply DTF Transfers on Wood?
Here's a comprehensive guide to applying DTF transfers on wood:
Materials:
- DTF transfer (with your desired design).
- Heat press (or Easy Press for smaller projects).
- Teflon sheet (or parchment paper).
- Heat-resistant gloves.
- Sandpaper (various grits, depending on wood condition).
- Optional: Primer or sealer suitable for wood (for increased adhesion).
- Optional: Clear coat sealant (for extra protection).
- Optional: DTF ink specifically formulated for wood (for enhanced scratch and water resistance).
- Lint-free cloth.
Steps:
Wood Preparation (Crucial Step):
Sanding: Wood is naturally porous, and for the best adhesion, you'll need a smooth and even surface. Sand the wood thoroughly with appropriate grit sandpaper (start with a coarser grit like 120 for rough wood, then progress to finer grits like 220 or 320 for a smoother finish). Sanding removes dirt, debris, and unevenness, allowing the transfer to adhere better.
Cleaning: Wipe away any dust from sanding with a lint-free cloth.
Optional: Priming/Sealing (Especially for Raw or Uneven Wood): For raw or uneven wood, consider applying a primer or sealer compatible with both wood and DTF transfers. This can further improve adhesion and create a more uniform surface for the transfer. Follow the manufacturer's instructions for the application and drying time of the primer/sealer.
Pre-Heat the Press:
Turn on your heat press and set the temperature according to the DTF transfer film instructions (typically around 300°F to 345°F). Allow it to preheat fully.
Position the Transfer:
Place the DTF transfer on the prepared wood surface, aligning it carefully in the desired location.
First Press (Low Pressure):
Wearing heat-resistant gloves, carefully place the Teflon sheet (or parchment paper) over the transfer. This protects the press platen and helps distribute heat evenly.
Gently press the transfer onto the wood with low pressure for a short duration (around 20 seconds). This helps remove moisture from the wood and activates the adhesive on the transfer.
Second Press (Full Pressure):
Remove the Teflon sheet and re-apply it on top of the transfer.
Increase the pressure on the heat press to the recommended setting (consult your DTF transfer film instructions, typically around medium pressure).
Apply heat for the specified duration (usually between 30 to 45 seconds). This fully cures the adhesive and bonds the design to the wood.
Cooling and Peeling:
Turn off the heat press and carefully lift it away from the wood. Let the wood cool down completely (it can take several minutes).
Once cool, gently peel off the transfer film at a slow and steady angle. If any edges resist peeling, you can carefully re-apply heat for a few seconds to reactivate the adhesive.
Optional: Clear Coat Sealer (For Extra Protection):
For additional protection against scratches, water damage, or fading, especially for outdoor applications or high-traffic areas, consider applying a clear coat sealant specifically formulated for DTF transfers on wood. Follow the manufacturer's instructions for application and drying time.
What Kind of Wood is Best Suited for DTF?
Here's a breakdown of wood types generally considered compatible, along with some considerations:
Smooth, Finished Wood:
These woods often provide a smooth and even base for DTF transfers, requiring minimal prep work (sanding might still be needed for better adhesion) Examples include:
- Plywood
- MDF (Medium-Density Fiberboard)
- Pre-painted wood
Denser Hardwoods:
These woods offer a smooth and non-porous surface, ideal for DTF adhesion. Examples include:
- Oak
- Maple
- Birch
- Walnut
- Mahogany
Softer Woods:
Some softer woods can work with extra surface prep like sanding, priming, and sealing. These might include:
- Pine
- Poplar
- Basswood (good for a smooth finish after sanding)
Woods That you Should Avoid (or to use with caution)
Oily woods: Woods with natural oils can affect adhesion. If you must use them, thorough cleaning and deglossing might be necessary.
Very softwoods: These may be too absorbent and require significant prep work for successful DTF application.